One of my favorite things about doing successful seller interviews is going back to their very first sale. For most sellers, that first sale says a lot about how far they have come in product photography. I’m calling myself out and pulling from the Energy Shop listing archives, as I highlight the do’s and don’ts of product photography. I like to think that my shop is ever-evolving, so I sincerely hope that in two years, my pictures of today will look amateurish and outdated!
I take all of my photos on a Canon EOS Rebel, and I highly recommend a digital single-lens reflex (DSLR) camera to anybody who is serious about photographing and selling their wares. I had the camera before I opened my Etsy shop, so everything seen here has been shot with a DSLR–which goes to show that you can shoot awful pictures on an excellent camera. I use the 18-55 lens that comes with the camera and the green box setting, which goes to show that you don’t need to be an expert because the camera is smart enough for the both of you. 🙂 Some of the product photos in my archives were shot with a 50mm lens (I’m including examples).
I opened the Energy Shop for business in May 2010, and here is a picture of my first sale:
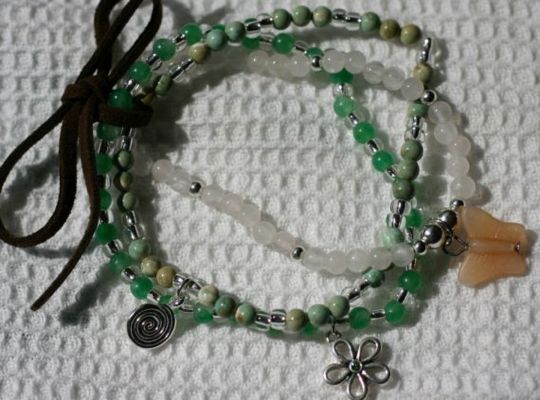
DON’T: List the first picture you take of your product. Take your time with it and sample different lighting and backgrounds.
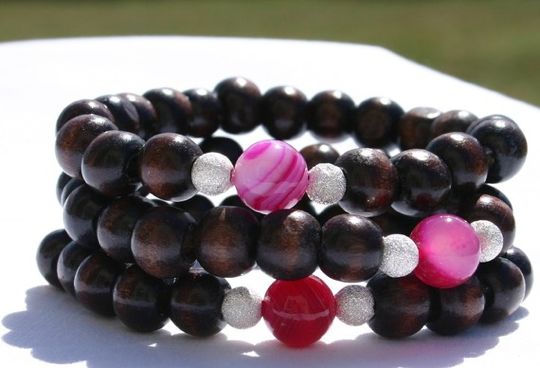
I just love the person who bought this, wherever she may be! This set of bracelets was taken on a white tea towel in my kitchen, with no flash. There were lights on in the kitchen, and sunlight coming through the windows. This shot screams “beginner.” In the listing, there is actually a picture of the bracelets laying on top of a cell phone. I’m not sure what I was thinking, but I do know that portraying scale was important to me back then (I also used to photograph the bracelets with a dime or safety-pin 🙂 ). For my product, scale is unnecessary and just cluttered the pictures.
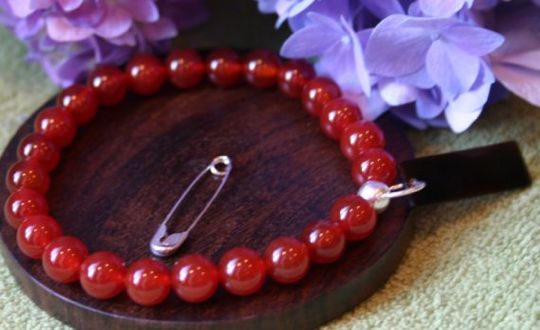
DON’T: Over-do the background. Avoid over-the-top props unless they directly relate to your product.
(HA! Told you I used safety pins 🙂 ) As soon as I started making my first sales, I started getting creative with the backgrounds. This Carnelian bracelet is situated on a green tea towel, still in my kitchen, and now there are artificial hydrangeas in the background. This is over the top, and looks completely silly to me. Reminds me of the saying, “Those who know better, do better.” It was clear that I was learning and searching to find the right look.
The next six pages of my sales show gradual improvement, and I love this about a shop’s history, you can literally watch the owner’s skill evolve. Seven pages in, my items started to look like this:
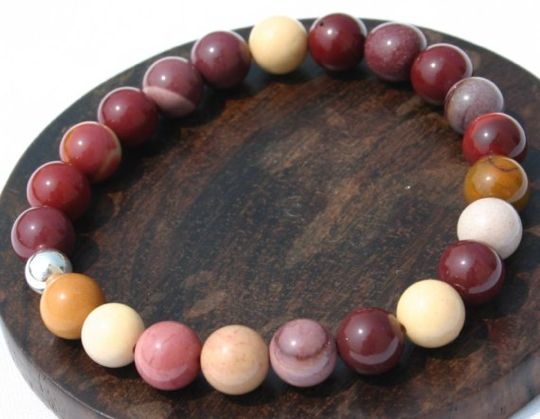
DO: Shoot in bright lighting with simple backgrounds.
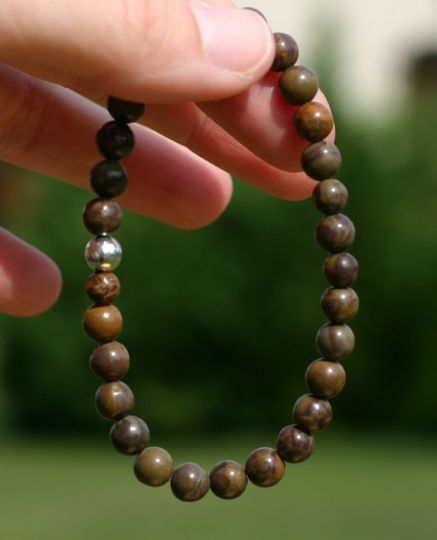
Same camera, very different approach. I’m shooting on plain white paper and a wooden display circle (I use hand-carved wooden coasters I purchased in Zambia). I was in my backyard in mid-day, full sun (early or late sun casts distracting shadows). I love this shot, because in a pinch I could still use it to show off the Mookaite gemstone today. It’s bright, easy to see detail, and timeless.
DO: Buy one great lens.
Here is a great example of what a 50mm lens can do for your product. I use the Canon EF 50mm f/1.8 II Camera Lens![]() (less than $100).
(less than $100).
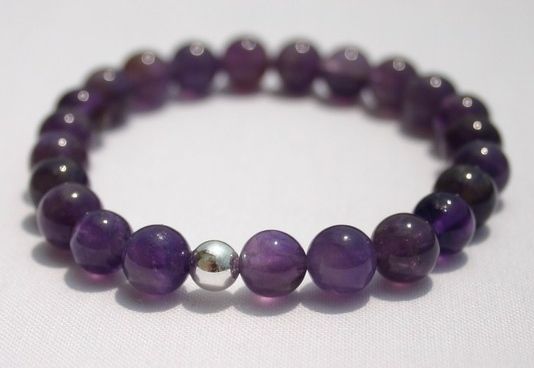
When people comment on a great photograph, it’s usually because it was shot with the 50mm lens. In switching to this lens on your DSLR, the subject pops, and the background blurs which gives the photograph dimension. Here you can see what it does to a product photograph. Again, this shot was taken on a white piece of paper outside in mid-day, full sun. This Amethyst is sharp in the front and then blurs toward the back. It still gives you a great idea of what the bracelet looks like, but it adds a little dimension and that makes it stand out.
I’m a huge fan of this lens, and here’s another example of why. You see the Chrysanthemum bracelet pop and stand out in the picture, and it looks gorgeous against the blurred greenery of my back yard. The 50mm is my go-to lens for great professional and personal photographs.
DON’T: Let the backdrop drop off.
While the lighting and backgrounds were improving, I was still making rookie mistakes. Here’s a great example of something that might look obvious to everybody else, but I only corrected it recently. This photograph is off-center, and that could have been easily corrected in crop. More importantly, the back-drop ends very early on in the picture. This is a highly unnecessary mistake, I had plenty of room to shoot within the back-drop, I just didn’t think it made that much of a difference.
DO: Make it seasonal.
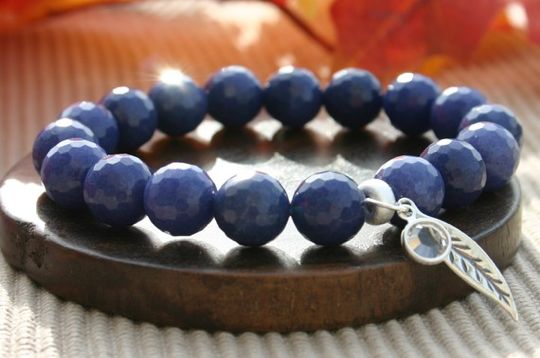
Just say no to creative backgrounds, unless they can be done to bring nostalgia for a season. In this photo, I used fake autumn foliage and morning light. I love the image I captured for this Blue Jade bracelet so much, that I bring it back to the shop every fall.

DO: Use a model.
How cute is this picture?! My children model the children’s jewelry for me, and I prefer not to show their faces. They are sprinkled through the archives holding up peace and love signs with their backs to the camera. These chip bracelets don’t look like much lying on their own in a picture, but stacked on the arms of my children, they are practically irresistible. When you have a great product but it’s hard to do it justice on its own in a photograph, get a model! In a crowded marketplace, models grab the viewer’s attention before a lifeless product photograph does.
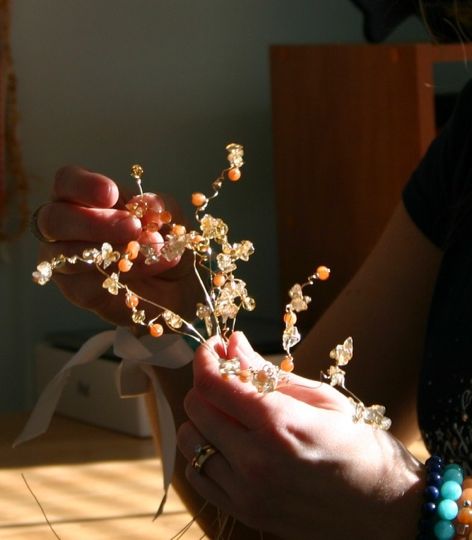
DO: Show your hands creating.
I loved having this shot in my shop listings when I was making gemstone trees. There’s something interesting about the stones and being able to see the hands working. Where can you incorporate photos of you actually making your product? People will love to see them.
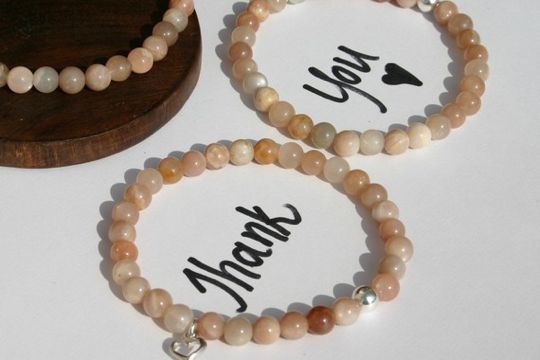
DO: Incorporate the message.
This is probably my best-selling, most viewed listing. I created this Sunstone appreciation bracelet when I reached 1,000 sales through my Etsy shop, and I think it radiates the gratitude I feel for my customers. I made a lot of these, so I took special care when photographing to make sure I was going to have 5 excellent pictures. The words grabbed people’s attention and drew them to the listing. I could have typed the words or printed them very neatly, as I’ve tried different variations in my listings. The handwritten “Thank You” was the best performer.
Currently, I try to keep things simple, clean, and bright:
DO: Love the money shot.
My jewelry looks best when I shoot on a clean background, outdoors in natural light. Keep it simple and you’ll know when you’ve achieved the perfect look for your product. Wishing you the money shot and all the best! Until next time.

These are some EXCELLENT tips! Thank you for sharing!
I definitely need to try the “message within” approach. How cool!
Thanks, Megan!
Very nice article. I needed that! I am constantly working on my photography.
Thanks, glad to hear it!
Thanks Lisa, your advice will prove to be invaluable! This is exactly the advice I needed to read. If you have the time to visit my website, you’ll see why!
Thanks, Sharyn! I love your website … Your photography will continue to evolve. If you start experimenting with brighter, more natural light I think you’ll be thrilled with the results. I appreciate your comment!
Great info. Thank you!
The very first picture represents my products now unfortunately! Thanks for the tips. Will take some new pictures now. 🙂
Great article. Do you never use a light box? I’ve been contemplating getting one for ages.
I bought one, Vanessa, but I found it to be more trouble than it was worth. I feel the exposure and lighting always need adjusted afterward.
That’s really so helpful to know. Thank you you Lisa 🙂
I’m wondering do you shoot outside in full sun, or outside in shade in the middle of the day? I make ceramics and have trouble with glare on the glaze in full sun.
Great article. Your photography tips were very helpful. Thank you.
Hi,
Thanks for the article .I have selling on eBay as well as on etsy (pasted the link above).just completed 500 sales today on etsy and in total if i count both on eBay and etsy ,this number would be somewhere near 2500 .I still find my picture quality not up to the mark .I invest lot of time clicking pictures (use light box and two side on lamps)( but than whenever start listing find pictures not as good as the real product is .if you could spare some time and help me out with the tips i will be highly obliged
Thanks & Regards
Singh
Hi Singh,
Great job on your work so far! Here are the products & services I have on offer: http://www.marketyourcreativity.com/welcome-here/productsandservices/
thanks for this great article !!
Great tips Lisa! I know photography is my weakest link. Dragging my feet on getting a DSLR & having to learn it. Your earliest “bad” photos were pretty good I thought. Guess it shows how bad mine really are…LOL, so time for a new camera, or maybe a better operator behind the camera!
Great tips! I see so many sellers shoot sub-par photos of their products, and I feel like it truly does affect the sale! Thanks for sharing!